

You’ve probably thought of starting your own garden and don’t know where to start, but trust me… we’ve all been there.
The good news is, we’ve done the research for you and have put all the information into one easy-to-read 10-step guide.
In this article, you’ll find information on how to start and till your garden, how deep to till the ground, some valuable suggestions and more.
Table of Contents
- How Deep to Till a Garden
- 10 Easy Steps in Tilling
- Step 1: Choose a Spot in the Garden
- Step 2: Mark Off the Area
- Step 3: Cut the Outside of the Marked Area
- Step 4: Remove All Soil From the Edge
- Step 5: Using an Engine-powered Tine Tiller, Till the Marked Bed
- Step 6: Remove the Grassy Soil
- Step 7: Add Topsoil and Compost
- Step 8: Mix the Compost and the Topsoil
- Step 9: Using a Cultivator, Properly Mix the Compost and Topsoil
- Step 10: Using the Back of a Rake, Flatten the Mix
- How to Till Safely
- Avoid the Back Pains. Learn Proper Garden Tilling.
How Deep to Till a Garden
When tilling a garden, it’s important to understand the difference it makes at every level of depth. Depending on how deep you till the soil, your crops and plants will have different results.
The general advice is to till the soil between 8-10 inches, or a little more if you’re tilling a new bed or the soil in your garden is poor. Alternatively, tilling the soil to a shallow level is recommended at the end of the growing season.
Risks of Tilling Too Deep
Although it is ideal to till the soil deeply, there are some risks involved if the soil is tilled further than the recommended 8-10 inches of depth. For starters, if the soil is tilled too deep, there is a high chance of killing microorganisms and earthworms that help the soil get all the nutrients needed by your plants.
On the other hand, tilling the soil deeply can be beneficial for the proper mixture of compost and soil, killing weed from its roots and allowing fertilizers to be more effective.
Risks of Tilling Too Shallow
Tilling the soil to a shallow level is preferably done at the end of the growing season as tilling during this period keeps the plants healthy and maintains their overall health.
However, tilling at a shallow level can also assist in the quick growth of weeds which, in turn, can cause a lack of proper nutrient absorption, negatively affecting plant growth.
The benefits of tilling at a shallow level include the higher likelihood of the formation of natural microorganisms and earthworms that help in the process of acquiring nutrients.
10 Easy Steps in Tilling
Get your tools, water and body ready for the easiest guide about tilling! Right after you finish you will thank yourself for finding this guide.
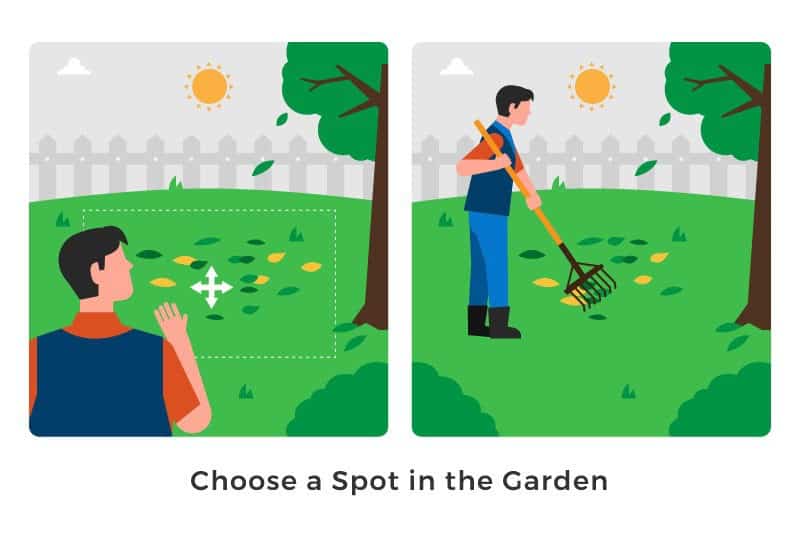
Step 1: Choose a Spot in the Garden
Walk to your garden or lawn and choose a big enough spot in which you want to till your garden bed. I recommend starting in a spot where the soil is leveled, clear of leaves and you will be able to move around the tools easily.
Step 2: Mark Off the Area
Using a can spray of landscape-paint, mark off the area that you’re going to till. This will make it easier for you to stay within the lines and know where you are cutting the area.
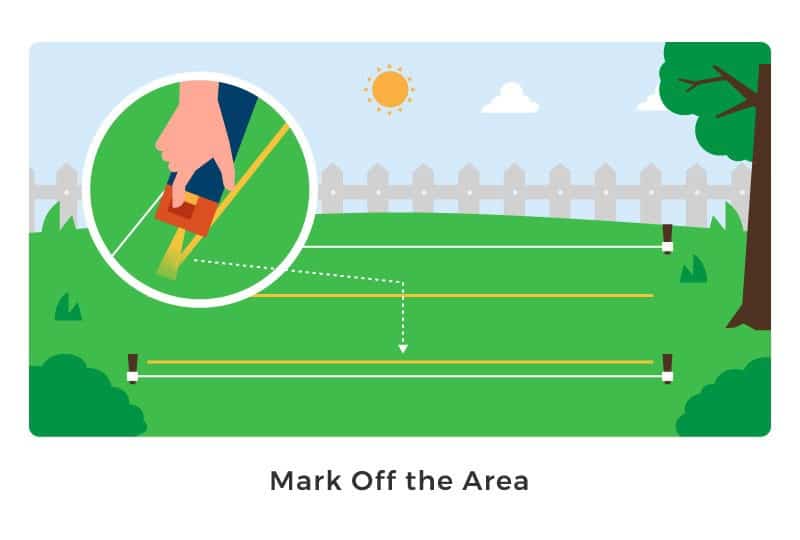
If buying spray paint is out of your budget you could try with different alternatives to mark soil but my recommendation is to get a spray can as it’s cheap and easier to see when cutting the area.
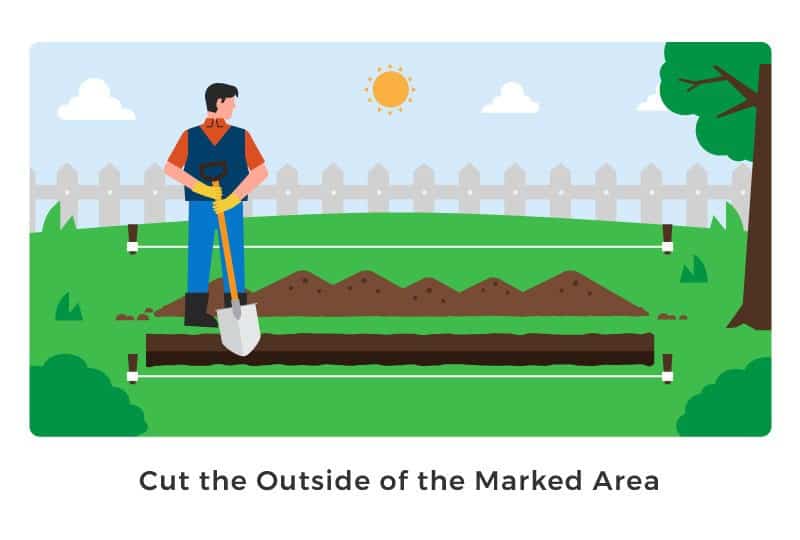
Step 3: Cut the Outside of the Marked Area
Grab a Trenching Spade tool and cut around the edges of the marked area. This will allow you to know what is the area you will be tilling.
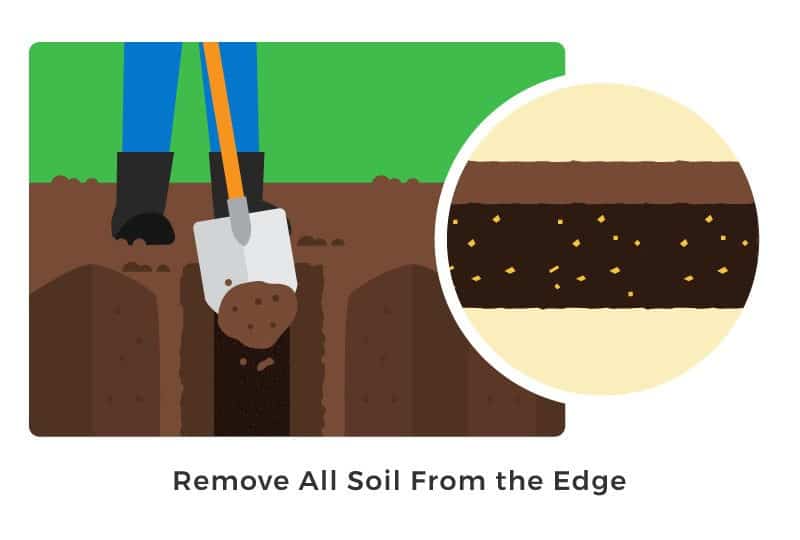
Step 4: Remove All Soil From the Edge
Using a shovel, gently pick up the leftover soil from the edges. There should be a solid block of soil in the middle with the edges cut off.
Step 5: Using an Engine-powered Tine Tiller, Till the Marked Bed
Using a rear tine tiller, step at the end of the marked bed and slowly move forward with the tiller, making sure the soil is being properly tilled.
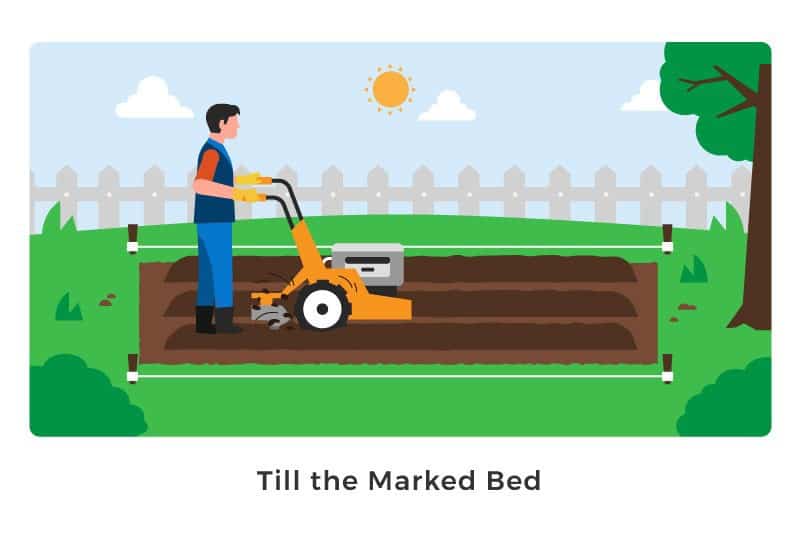
When searching for an engine-powered tiller you might find there are two types of tillers. Front engine and rear engine. Below, we discuss when to use a front tine tiller and when to use a rear tine tiller.
- When to Use a Front Tine Tiller
Front tine tillers are suitable when the tiling needs to be done around small spaces or around obstacles. The tines are located in front of the wheels and they rotate in a forwards direction. Front tine tillers are cheaper compared to rear tine tillers.
- When to Use a Rear Tine Tiller
Rear tine tillers are best for larger spaces or open gardens. The wheels are self-propelled and they rotate in either direction. These are more advanced tillers that allow gardeners to perform many different jobs. As expected, due to their advanced mechanism, they are more expensive.
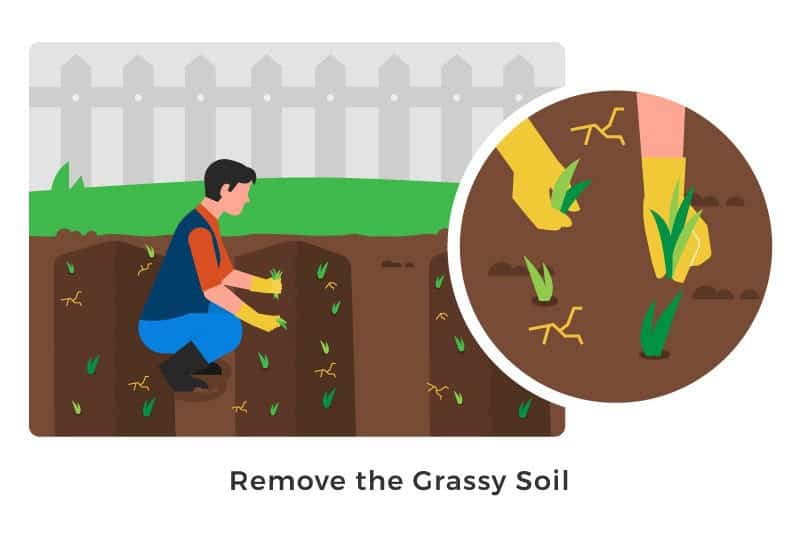
Step 6: Remove the Grassy Soil
Remove all the soil that has been tilled until there is an empty garden bed.
Step 7: Add Topsoil and Compost
Add a mix of ⅔ of Topsoil and ⅓ of Compost into the empty bed.
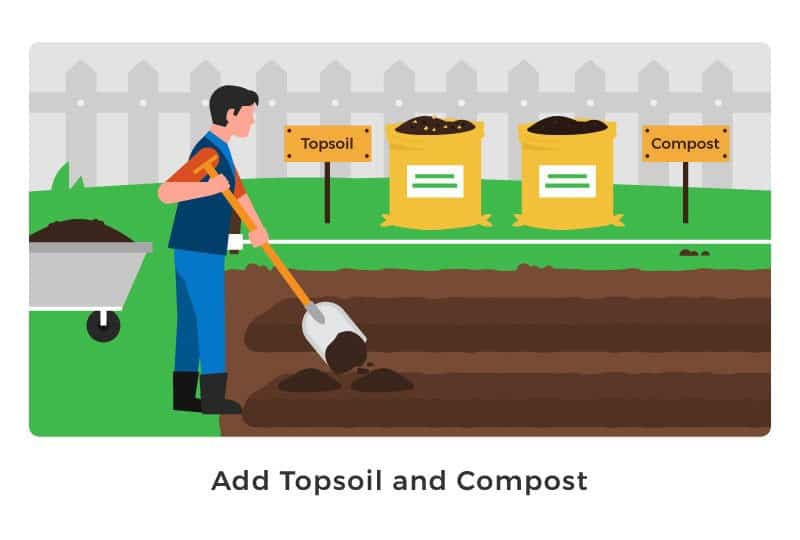
My advice about topsoil and compost is that although you could make your own, there is a big chance it won’t be of good quality and this can have a notorious impact on the quality of the plants. I recommend investing on quality topsoil and compost because, in the long term, you will see the difference in the quality of the plants you grow.
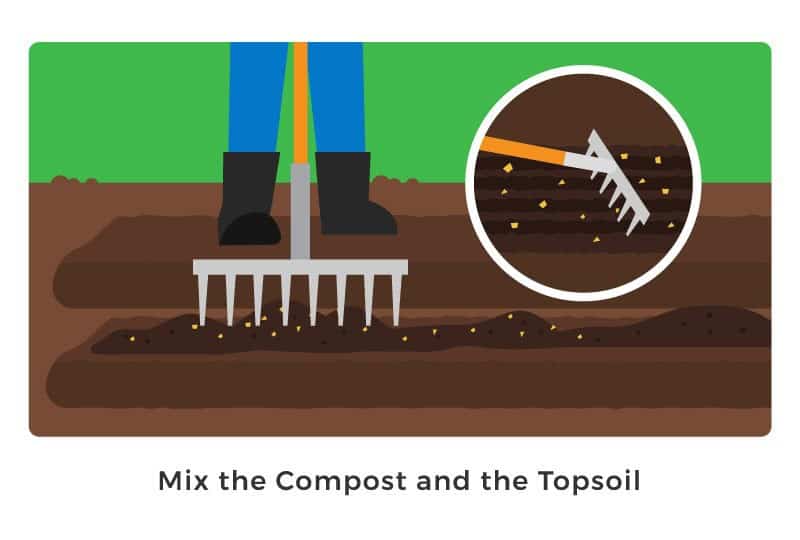
Step 8: Mix the Compost and the Topsoil
Using a rake, gently mix the compost and the Topsoil. Don’t worry if it’s not completely mixed, in the next step we will make sure it is properly mixed.
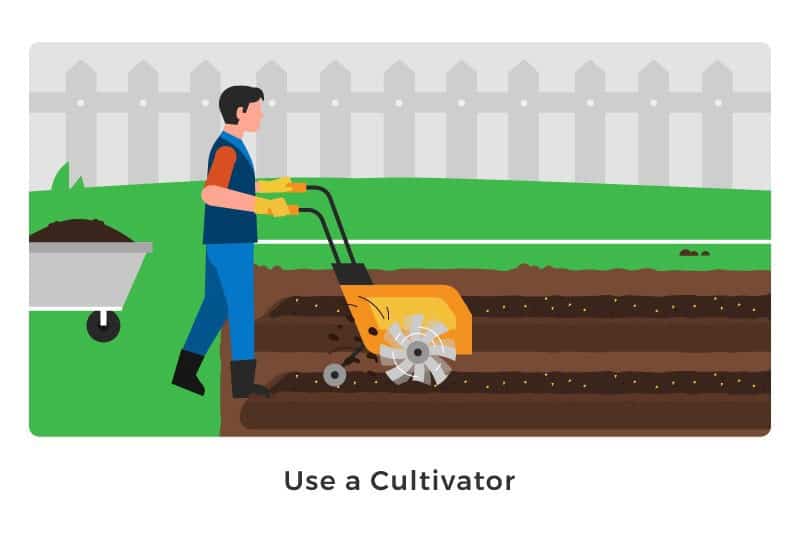
Step 9: Using a Cultivator, Properly Mix the Compost and Topsoil
Grab a cultivator and just like with the tiller, step at the end of the marked bed and move forward, now we need to make sure all the soil and compost are being mixed. The purpose of the cultivator is to make sure everything is completely mixed.
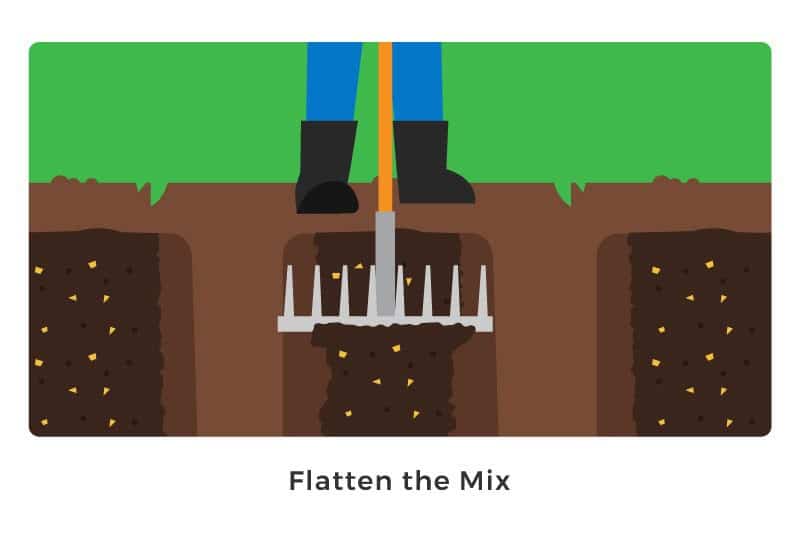
Step 10: Using the Back of a Rake, Flatten the Mix
Finally, using the back of the rake, flatten the mix and make sure it’s all even. Once, the soil looks flat, you’re ready to plant!
How to Till Safely
Tilling is part of the gardening process. And just like any physical job, it comes with safety precautions to avoid injuries, pains or unfortunate accidents.
Here’s a best practices list you can do when tilling to make sure you encounter no mishaps.
- Stretching before grabbing any tools or equipment. Especially stretching your back, joints, arms and leg muscles.
- Using gardening gloves, goggles and a good pair of boots. (My recommendation is to use steel-capped boots to prevent accidents from happening when using the tiller or the cultivator.)
- Making sure all pieces of equipment are working properly and are ready to go.
- Having an emergency plan in case of injuries or accidents.
Avoid the Back Pains. Learn Proper Garden Tilling.
Now that you know the 10 easy steps to till a garden, it’s important that you don’t forget how essential it is to properly till the soil, make sure it’s the right depth and how beneficial it is for the plants to be free of weeds, absorb all the nutrients and the ecosystem around them.
And don’t forget also how beneficial it is for you to till properly so you can grow healthy plants that produce good fruit and vegetables. You don’t have to constantly spend lots of money on new plants or tiling over and over.
In general, if you spend your money wisely on good equipment and compost, gather enough information to know what you’re doing, and always remember stretching before doing any job, you will have a better idea on where to start and how to do the job.